Your organization has evaluated Dynamics 365 CRM and you are ready to begin the migration process from one or many legacy systems. There are a number of steps to ensure that your migration is successful. In this post we lay out a plan for a data migration and provide an example of the process.
Discovery
The first step your organization will want to embark on is the discovery phase. Here you will evaluate your systems for establishing what data sources and fields need to be migrated over to Dynamics. We recommend conducting business user interviews to make that determination so you bring over the data you need, leaving the unnecessary behind to keep your new implementation clean. Part of this process will also include documenting what features are required in Dynamics so you can create relationships, custom entities and business processes.
Data Mapping
The next step will be to map your data over to the Dynamics entity fields. A great tool to have is the XRM tool box, Metadata Document Generator. https://www.xrmtoolbox.com/

This will allow you to download all entities that you will be migrating to. Export the logical/schema/display names, data types and metadata values such as option sets.

Using this as a template, map your legacy fields to the dynamics CRM fields. You will likely have custom entities that will need to be created during this process.
Migration
You’ve worked with the business, created fields, custom entities, relationships and have a data mapping document. There’s a few different ways to complete the migration task either using the native import in Dynamics or using a tool such as Kingswaysoft or CozyRoc in SQL Server Integration Services (SSIS). We recommend SSIS in conjunction with migration scripts in SQL Server which will provide more control and integrity to the process.
Additionally, these scripts will provide a great reference document pointing to exactly what the source and destination was at time of migration. In our experience, your users will be asking for this information during the months to years following your migration until full user adoption occurs.
Once your data has been migrated, the next step of the process is to have stakeholders test, verify and sign off on the data in a sandbox environment so you are ready for a production deployment on your go-live date.
Elev8 Technology Group is here to help!
There are many complexities to the process and a partner can help guide you through a successful migration from evaluation to migration.
Example Migration Using SSIS
In this demo we will make the assumption that the discovery and mapping phases are complete. We will import a simple customer dataset that contains both individuals and company information to SQL Server, create migration scripts and use SSIS with Kingswaysoft to perform the migration.
Our goal is to take the sample customer table and split it into two migration scripts for the account and contact entities in Dynamics. Here is the SSIS flow that we will create.

Step 1: Import Customer data to SQL Server
- There are a few different ways to import your data, we will use SSIS with an Excel source and database destination.
- Create a new SSIS package
- Drag a data flow task to the canvas
- Within the data flow task, add an Excel source selecting the source file path and sheet
- Add an OLE DB destination and drag a path from the source to the destination
- Within the destination, select the SQL Server connection manager and create a new table called dbo.customer
- Verify the mappings and execute the task which will import the excel data to the dbo.customer table

- Now you can select the data from dbo.customer

Step 2a: Create the Account Migration Script
- Using the dbo.customer table, create a script to transform the company data for the account entity in Dynamics.
- Rename the source fields using an alias to the destination schema
- Create necessary transformations for import
- We will convert the company_type values of “Other, Customer and Vendor” to corresponding integer option set values in Dynamics.

Step 2b: Migrate Accounts
- Create another data flow task in SSIS
- Add an OLE DB Source and insert your SQL migration script
- Add a KingswaySoft Dynamics CRM Destination and drag the source to the destination
- Connection Manager: Select your established connection manager
- Action: Create
- Destination Entity: Account
- Column Mapping: Ensure all your input column fields map to a CRM field destination
- Execute the task


- 494 account rows have been migrated! Verify your migration count along with proper field mapping.

Step 3: Pull Accounts to the Migration Database
Before migrating the contacts in the next step we need to be able to reference the GUID values of the imported accounts. This allows for the ability to join and assign which account each contact is associated with. There are a few ways to query the CDS, we will stick with Kingswaysoft in this example.
- Add a new data flow task
- Add a Kingswaysoft CRM Source
- Source Type: Entity
- Source Entity: Account
- Columns: If you have a large dataset, only pull the fields you need such as a legacy reference id and the dynamics id (accountid)
- Add a OLE DB destination and drag the source to destination
- Create a new table called crm.account
- Execute the task

Step 4a: Create the Contact Migration Script
- Use the same steps from the account migration script and rename the source fields to the destination and create any necessary transformations.
- In this script, join to the newly created crm.account data in order to import the accountid GUID lookup value to the parentcustomerid field on the contact entity

Step 4b: Migrate Contacts
- Create another data flow task in SSIS
- Add an OLE DB Source and insert the SQL migration script
- Add a KingswaySoft Dynamics CRM Destination and drag the source to the destination
- Connection Manager: Select the Dynamics connection manager
- Action: Create
- Destination Entity: Contact
- Column Mapping: Ensure all your input column fields map to a CRM field destination
- Execute the task

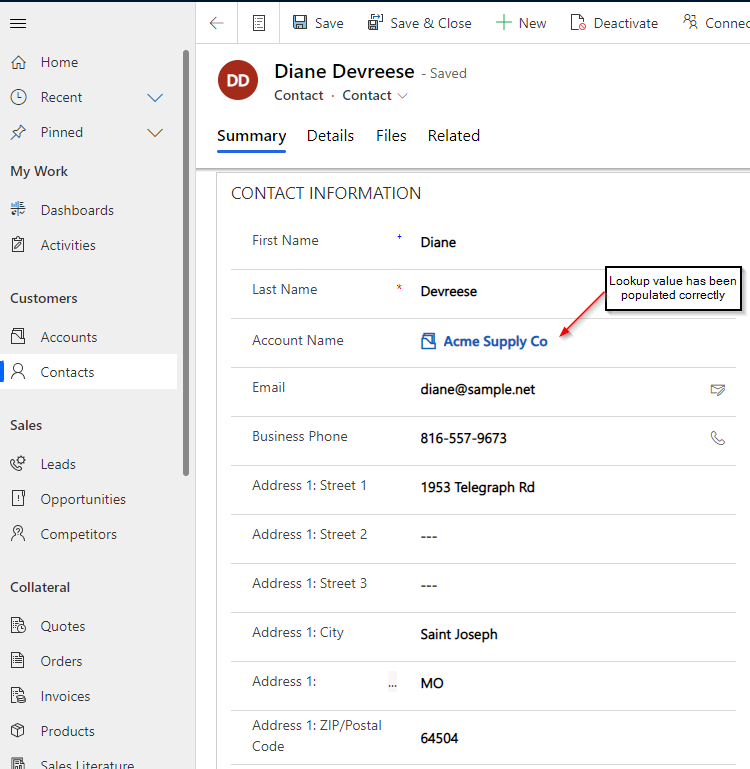
- 500 contacts have been migrated! Once again, verify the migration count and field mappings. In this example, the accountid GUID values correctly populated the account name lookup.